By now we’ve taken brides through a backdrop draping tutorial and hall decoration tutorial. This month, we will take you through how to drape your own wedding head table.
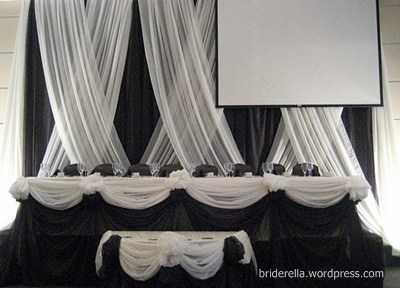
We’ll be creating the following draping:

To start, you’ll need to rent or buy fabric that will cover the length and sides of your head table, plus some extra to do the bunching. Ask your hall for the length and width based on your wedding party size.
Once you have the fabric, decide how many fabric rosettes you want to create along the length. The pictured head table has 5 rosettes from corner to corner.

Start with a basic tablecloth on the head table. You’ll be using this cloth to fix pin other fabrics on, so make sure it’s secure on the table and not sliding off. You may need to pin secure this base tablecloth by sticking some masking tape on the table, and pinning the fabric to the tape using small pins.
Start from the very back corner of the headtable facing the bridal party. Pin along the top edge and let it drape down in between each bunching. You will need to measure and bunch the fabric up evenly at regular intervals.

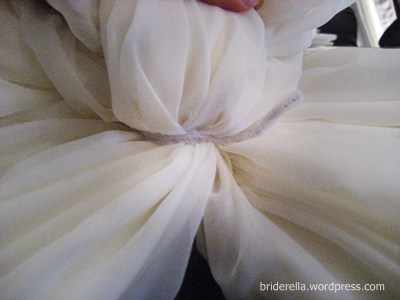
At each desired interval, use twisty-ties to gather up the fabric into a bunch. Fan the fabric out from the center so it becomes a round rose shape.

You will also need to pin along the side of the rosette to make sure it stays up.

You may also want to take the fanned fabric and pin it along the top so it goes just over the top edge of the table.
You can repeat another layer of fabric and bunching underneath. Here we have done this in brown fabric.
For the cake table, we took 2 rosettes from the brown under layer and pinned it high on the same level as the white fabric, so we have alternating colour rosettes.
And voila, you have a simple yet beautiful draped head table.
By the way, I just discovered, if you want to create some other colour accents such as chair sashes, Michael’s has a great selection of multi-purpose tulle in the wedding section.

For other ideas on how to decorate your headtable, don’t forget to check out the rest of our blog. Check out this clever idea using paper and strings (seen at the Civilized Bride Show):


Thanks for these detailed directions. I thought it would be more complicated, but it seems do-able and I love the ideas of using a splash of color in the chair sashes!
I really like your directions. I have to decorate my friends wedding. Do you also have video on how to do these decorations. If so tell me please. I am willing to pay of the video.
Thank You,
Dipak Singh
Hi Dipak, thank you! Unfortunately I didn’t take a video of this, but stay tune I might do that in the future. It is pretty easy – get someone artistic to help, and you’ll be fine.
I love this table decor its simply and very elegant. I have one question how much material is need for an 8 foot table and or how much fabric is used for the rosettes?
thanks
Ronda
Thanks for the instructions. I am planning on doing a headtable for my brother’s 50 birthday party.
I will definitely use this instruction to create his head table.